Getting Started with Waijung & STM32F4 Target
1 Introduction
In the previous chapter, we have discussed about MATLAB and Simulink, how we can use them and what are the advantages using these tools. In this chapter our prime objectives will be
- What are the minimum software and hardware requirements for using Waijung with imagin hardware?
- Installation procedure to connect the hardware with Simulink
- Recommendations while installations
We will start this chapter with minimum requirements.
2 Minimum Requirements
We can categorize the minimum requirements into two sections based on the software requirements and hardware requirements.
2.1 Software Requirements
Software requirements can be further classified into three categories and they are:
- Operating System Requirements
- MATLAB Tool Suite
- Waijung Blockset
- STM Microelectronics STLink Utility
2.1.1 Operating System Requirements
- Microsoft Windows XP SP3 or later.
- Windows 7 recommended
- Works fine on Windows 8 /8.1
Above mentioned operating system can either 32 bits or 64 bits.
2.1.2 MATLAB Tool Suite
Mathworks Inc. software suite consisting of the following toolboxes and blocksets.
Table 1: Required tools for MATLAB/Simulink

2.1.3 Waijung Blockset
Please note that Waijung Blockset supports both 32-bits and 64-bits operating systems, as well as, MATLAB 32-bits and 64-bits versions.
- GNU Tools for ARM Embedded Processors – There is no need to download this compiler as it comes with Waijung package by default. More information about GNU tools for ARM embedded processors can be found from the following website.
https://launchpad.net/gcc-arm-embedded
- Keil Microcontroller Development Kit for ARM (MDK-ARM) version 4.60 or later. Free MDK-Lite Edition (32KB Code Size Limitation) is available for download from the following link. It does not require a serial number or license key.
https://www.keil.com/demo/eval/arm.htm
- IAR Embedded Workbench for ARM (EWARM) version 6.4 or later. Free KickStart edition of IAR Embedded Workbench for ARM (32KB Code Size Limitation) is available for download from the following link. Registration by the user is required.
http://supp.iar.com/Download/SW/?item=EWARM-KS32
2.1.4 STM Microelectronics ST Link Utility
ST Link Utility enables automatic flash programming directly after the build process as well as in-circuit debugging. Details regarding installation of ST Link Utility will be discussed in Hardware Requirements section.
2.2 Hardware Requirements
Waijung Blockset and STM32F4 Target support a complete range of STM32F4 family of Hi-Performance & Digital Signal Processing (DSP) Microcontroller Unit (MCU). However, the cheapest and fastest way to get started is to test out the blockset with the STM32F4 DISCOVERY Kit which is a low-cost development Kit from STMicroelectronics. For as low as US$ 15, STM32F4DISCOVERY Kit can be purchased directly from Aimagin website from the following link.
https://www.aimagin.com/stm32-f4-discovery.html
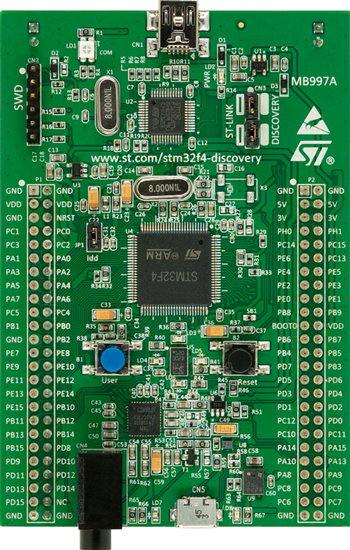
Figure 1: STM32F4 Discovery
Following are the features of STM32F4 Discovery
- It uses ARM Cortex M4 processor which is an industrial standard.
- It has 32 bits hardware floating point which implies fast digital signal processing up to 160 MHz unlike old days microcontroller in which the user cannot do hardware floating point.
- Ethernet connectivity. Can be used with remote control
- Camera interface
- Low price –500 THB
3 Installation of Drivers for aMG USB Converter – N
The aMG USB Converter – N consists of two chips which are stacked together. On the left hand side of Figure 2, reader can see the two chips stacked together and in the middle and right hand side, reader can see both chips separately. The drivers for aMG USB Converter comes along with the package of Waijung but it is recommended to install the most up to date Virtual COM driver from FDTI website from the following link depending upon which operating system the user is using.
http://www.ftdichip.com/Drivers/VCP.htm
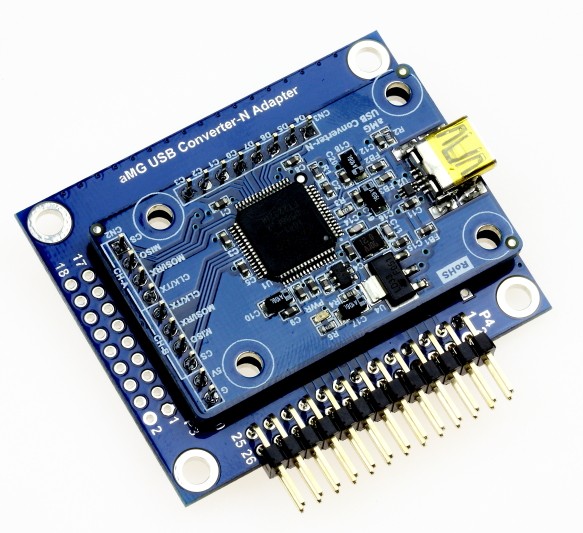
Figure 2: aMG USB Converter – N
Now the question comes, why we need to do this. The answer is very simple. It is very essential for Hardware Inter Loop (HIL) test and help the MATLAB/Simulink to communicate with the embedded target in real time for open loop and close loop up to 2 KHz and 1 KHz respectively. However actual performance depends on computer and software running on the system.
Once the drivers are installed, the user need to check whether the drivers are installed properly. This can be done by going to Device Manager of the operating system and looking at the Ports (COM & LPT). This hardware has two serial to USB port. By default aMG USB Converter N will be connected to channel 1 (normally the smaller port number).
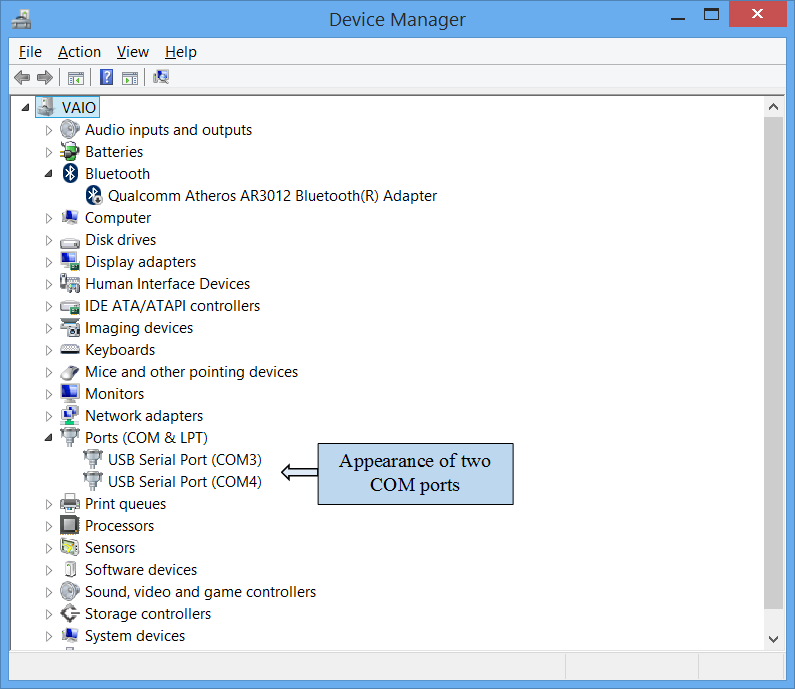
Figure 3: Device manager showing two COM ports
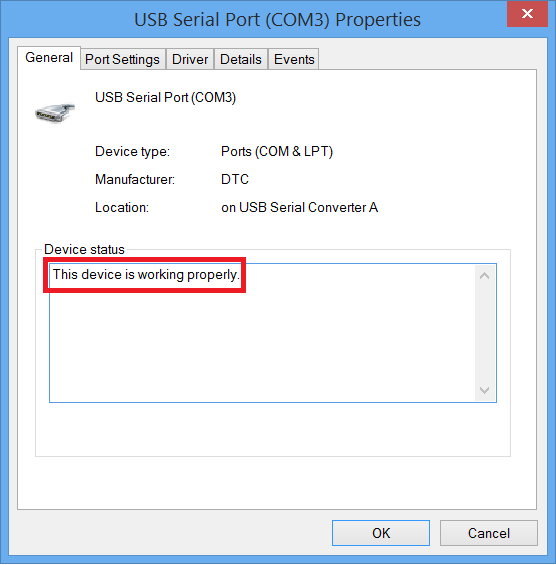
Figure 4: Checking if the device is working properly
In order to make the embedded target work HIL in real-time environment, we need to change the port setting by going to USB Serial Port properties ->Port Settings -> Advanced. In the advanced settings of USB Serial Port properties, change the Latency Timer to 1.
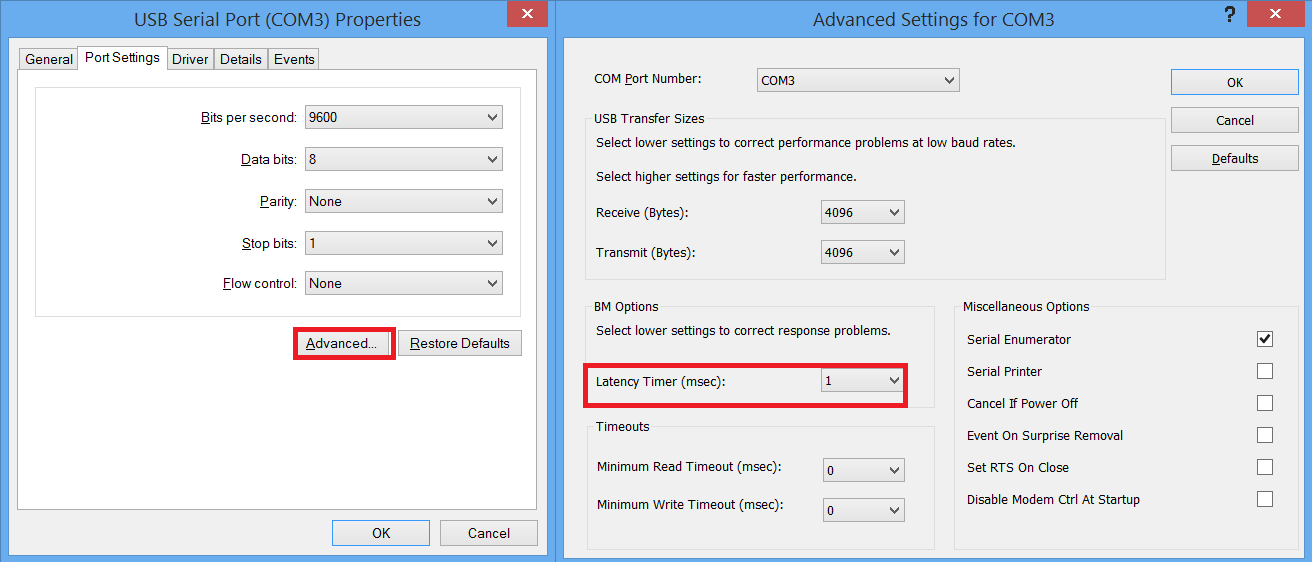
Figure 5: Advanced settings for USB
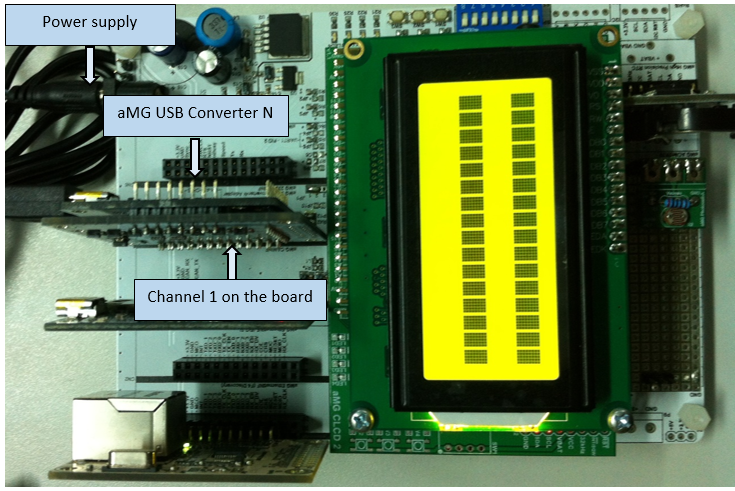
Figure 6: Hardware connection
4 ST Link Utility Installation
Now the next step is to install ST Link Utility on the operating system. There is a slight difference while installation of ST Link Utility installation on Windows 7 and Windows 8 in terms of drivers as shown in Figure 7 but rest of the procedure is the same.
Before the user proceed further, he/she must make sure that installation of MATLAB/Simulink as mentioned in software requirements is complete. The first step is the download and install ST Link Utility which allows the communication between the target (STM32F4 board) and Simulink or PC. Furthermore ST Link Utility is also useful for programming the flash memory. ST Link Utility V2 can be downloaded from STMicroelectronics website. The direct link to download is as follows.
http://www.st.com/web/en/catalog/tools/FM146/CL1984/SC724/SS1677/PF251168
When the user will click on the page, then user need to scroll down where description as shown in Figure 7 will be given.
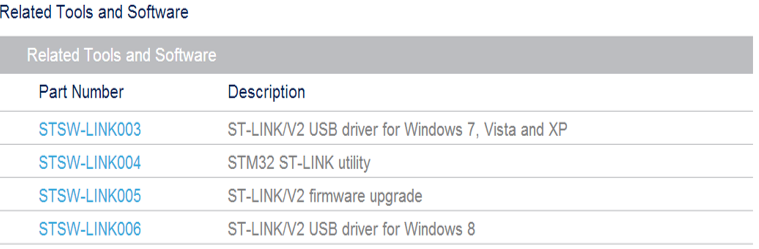
Figure 7: ST Link Utility Download options
Respective drivers can be downloaded based on the operating system installed on the computer and proceed with the installation. When the installation is done, connect the target. The target can be:
- STM32F4 Discovery
- FiO2 board
For STM32F4 Discovery, connect the target with the computer via USB as shown in Figure 8. STM32F4 Discovery has ST Link V2 debugger on the board.
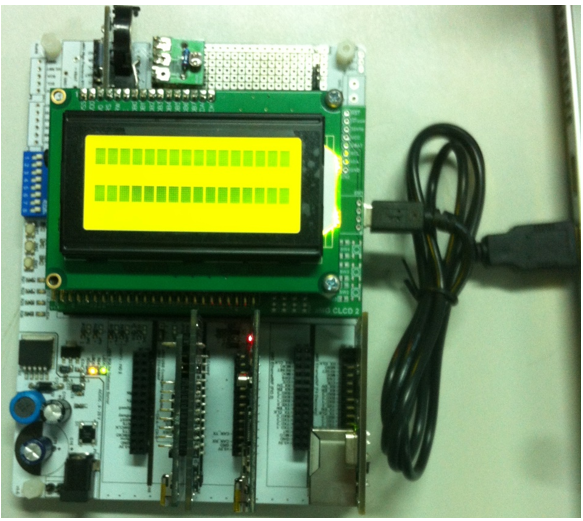
Figure 8: Computer and STM32F4 Discovery connection
However FiO2 requires a separate debugger ST Link V2 which can be purchased from Aimagin website from the following link.
https://www.aimagin.com/st-link-v2.html
Go to the installed ST Link Utility and click on Connect to Target.
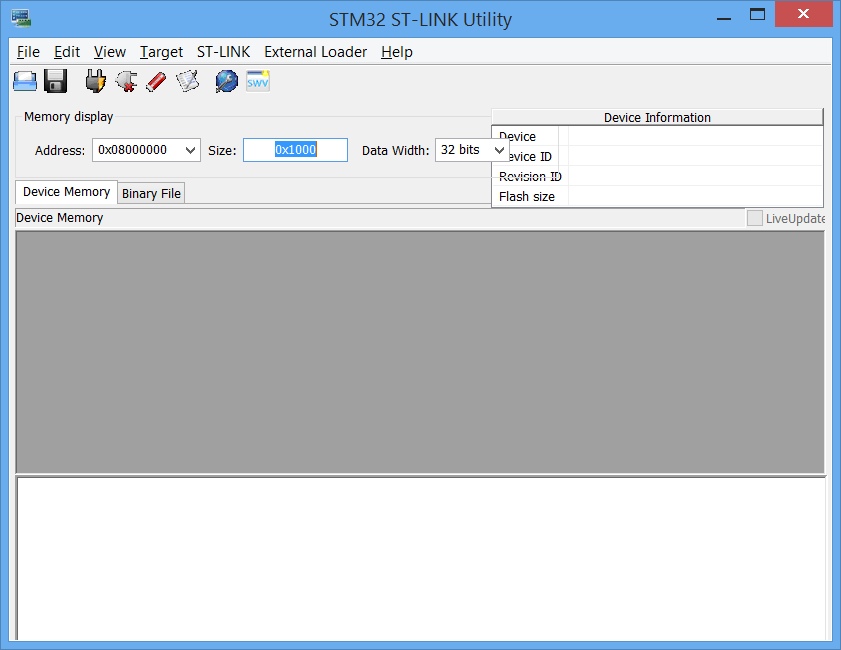
Figure 9: STM 32 ST Link Utility
If the target is not connected properly or/and hardware is malfunctioning, then error will be displayed which is shown in Figure 10.
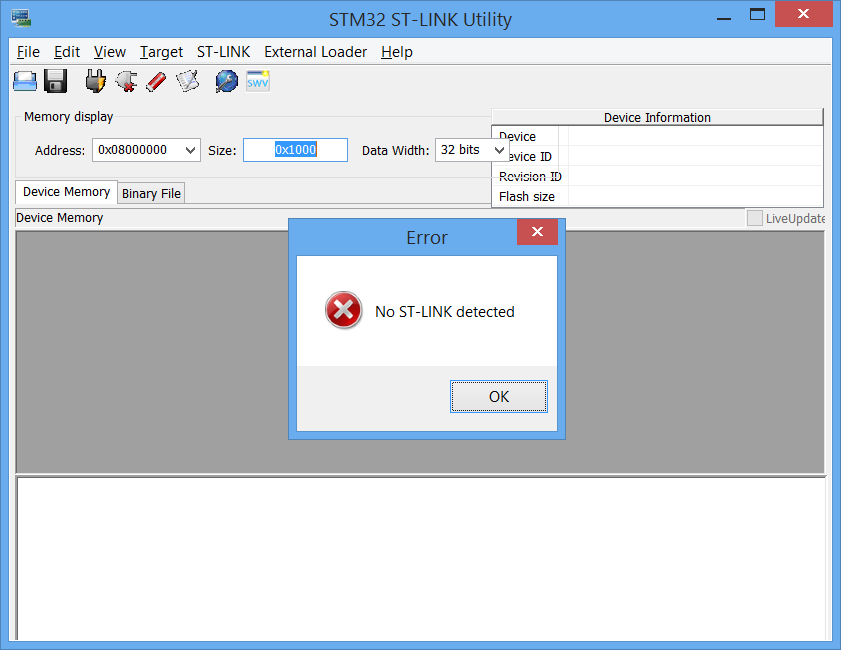
Figure 10: Displaying error while connecting STM 32 ST Link Utility with the target
If everything is fine, then user can see window as shown in Figure 11.
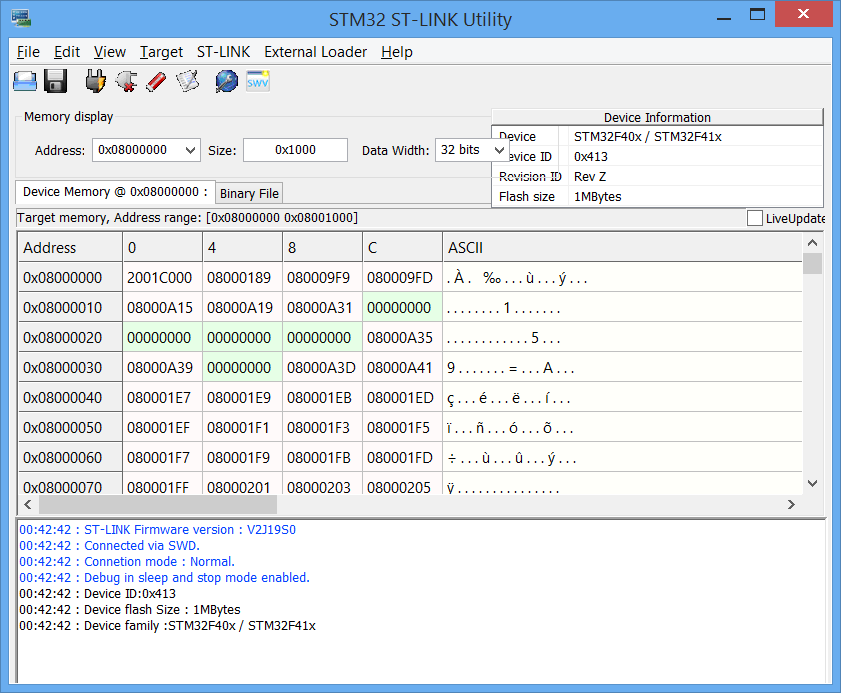
Figure 11: Successful connection between STM 32 ST Link Utility and the target
Next is to go to ST-LINK->Update Firmware update. A new window will open as shown in Figure 12.
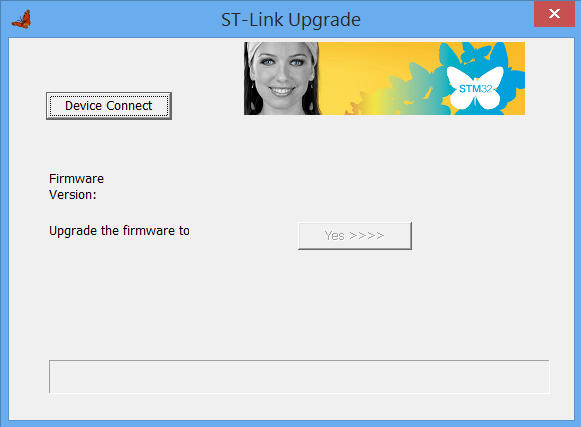
Figure 12: Updating Firmware
Then click on Device Connect as highlighted in red in Figure 12. If the firmware is not up to date it will give an option to update. Click on Yes to do so. Please note that if the user get error while updating the firmware then just unplug the target from the computer and connect it again. Re-try then.
5 Installing Waijung
Run MATLAB as administrator.
Go to the location on the local hard drive where waijung14_03a is available. Inside that folder there will be file named install_waijung.m. Open the file using MATLAB and click on Run.
Now the installation process will begin and it will take some time. If everything is OK then the user can see something similar like Figure 13. At the end of installation, MATLAB will pop-up Enable Automatic Update checking window will appear. It is strongly recommended to click Yes on that.
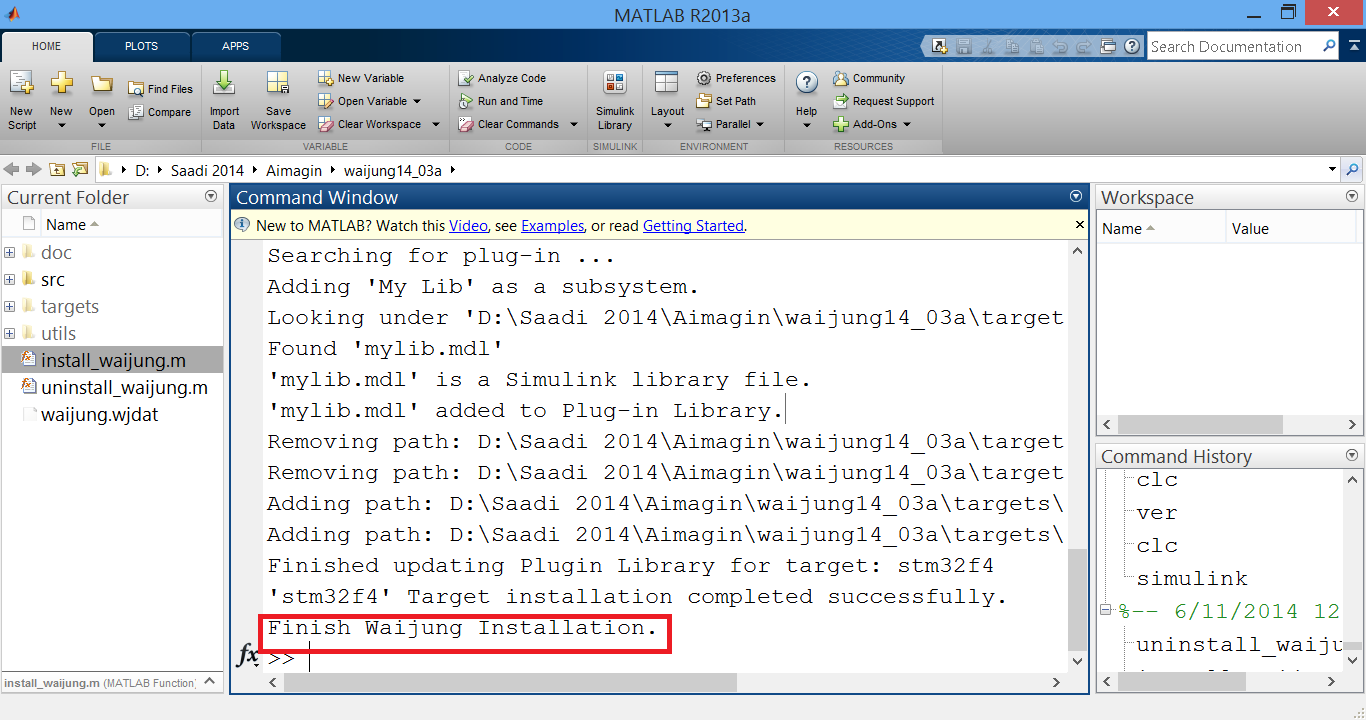
Figure 13: Waijung Installation
At the end, the use need to check if Waijung can communicate with the target. For that purpose, user should type waijung.checkTargetConnection and it will give options to select the target as shown in Figure 14.
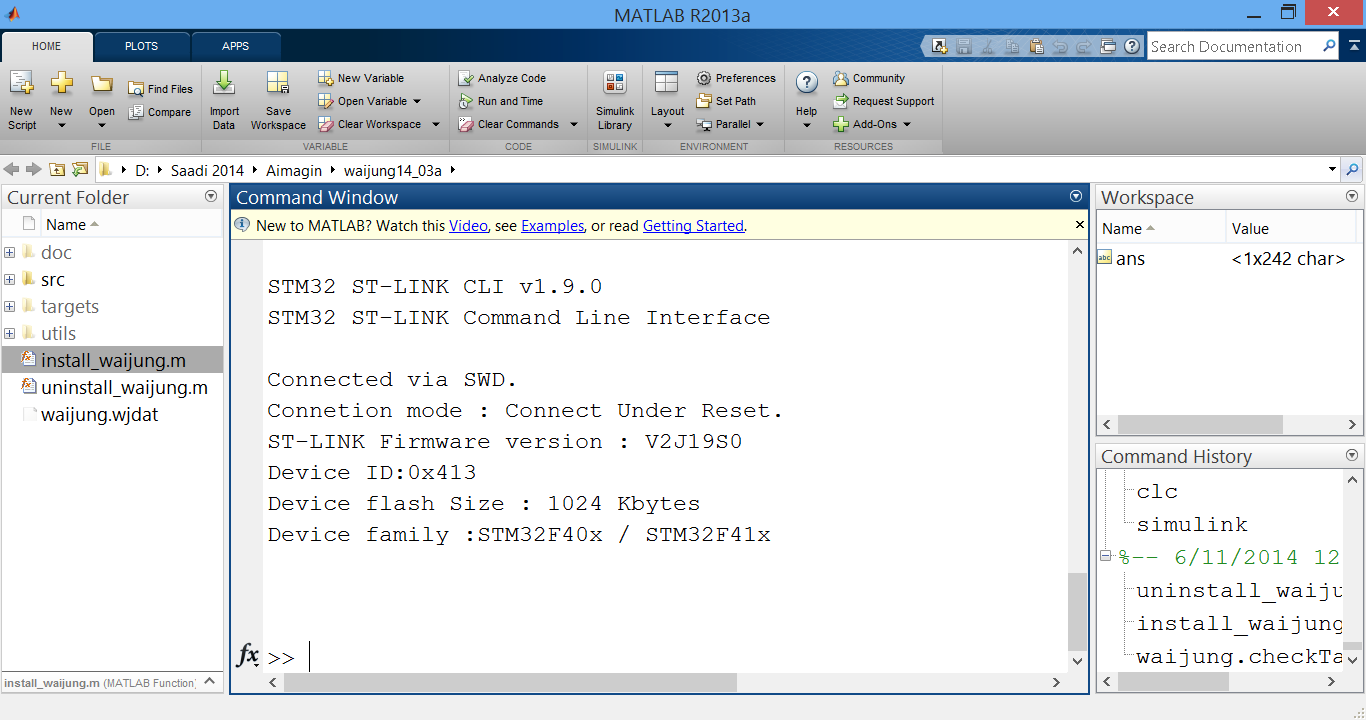
Figure 14: Checking target connection using Waijung
There is a trick if waijung.checkTargetConnection is not working. Type waijung then press Tab button from the keyboard, it will display all possible functions using Waijung as shown in Figure 15.
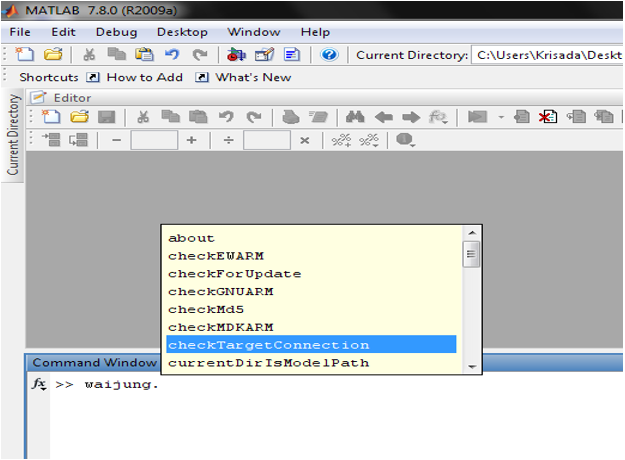
Figure 15: Waijung functions
6 Recommendations
Following are the recommendations which users need to follow
- Manually remove ST Link Utility if upgrading
- Change latency time for aMG USB Converter – N as shown in Figure 5
- Don’t forget to close ST Link Utility after use
- Run MATLAB as Admin when installing Waijung
- Checking with waijung.checkTargetConnection
- Update ST Link V2 Firmware as shown in Figure 12